Monday 22 April 2013

a raspberry & coconut cacao loaf

I'm a morning person.

No, I tell a lie. I'd like to think that I am a morning person, but the truth is the only time I get out of bed without complaining (endlessly) is when I have an exciting breakfast to look forward to.

Autumn has certainly arisen in Melbourne ("Spring has sprung", "Autumn has arisen" - get it? Clever, right? Ah, never mind) and whatever I'm having as my first meal of the day has got to be tempting if it's going to lure me out of the warmth and comfort of my bed.

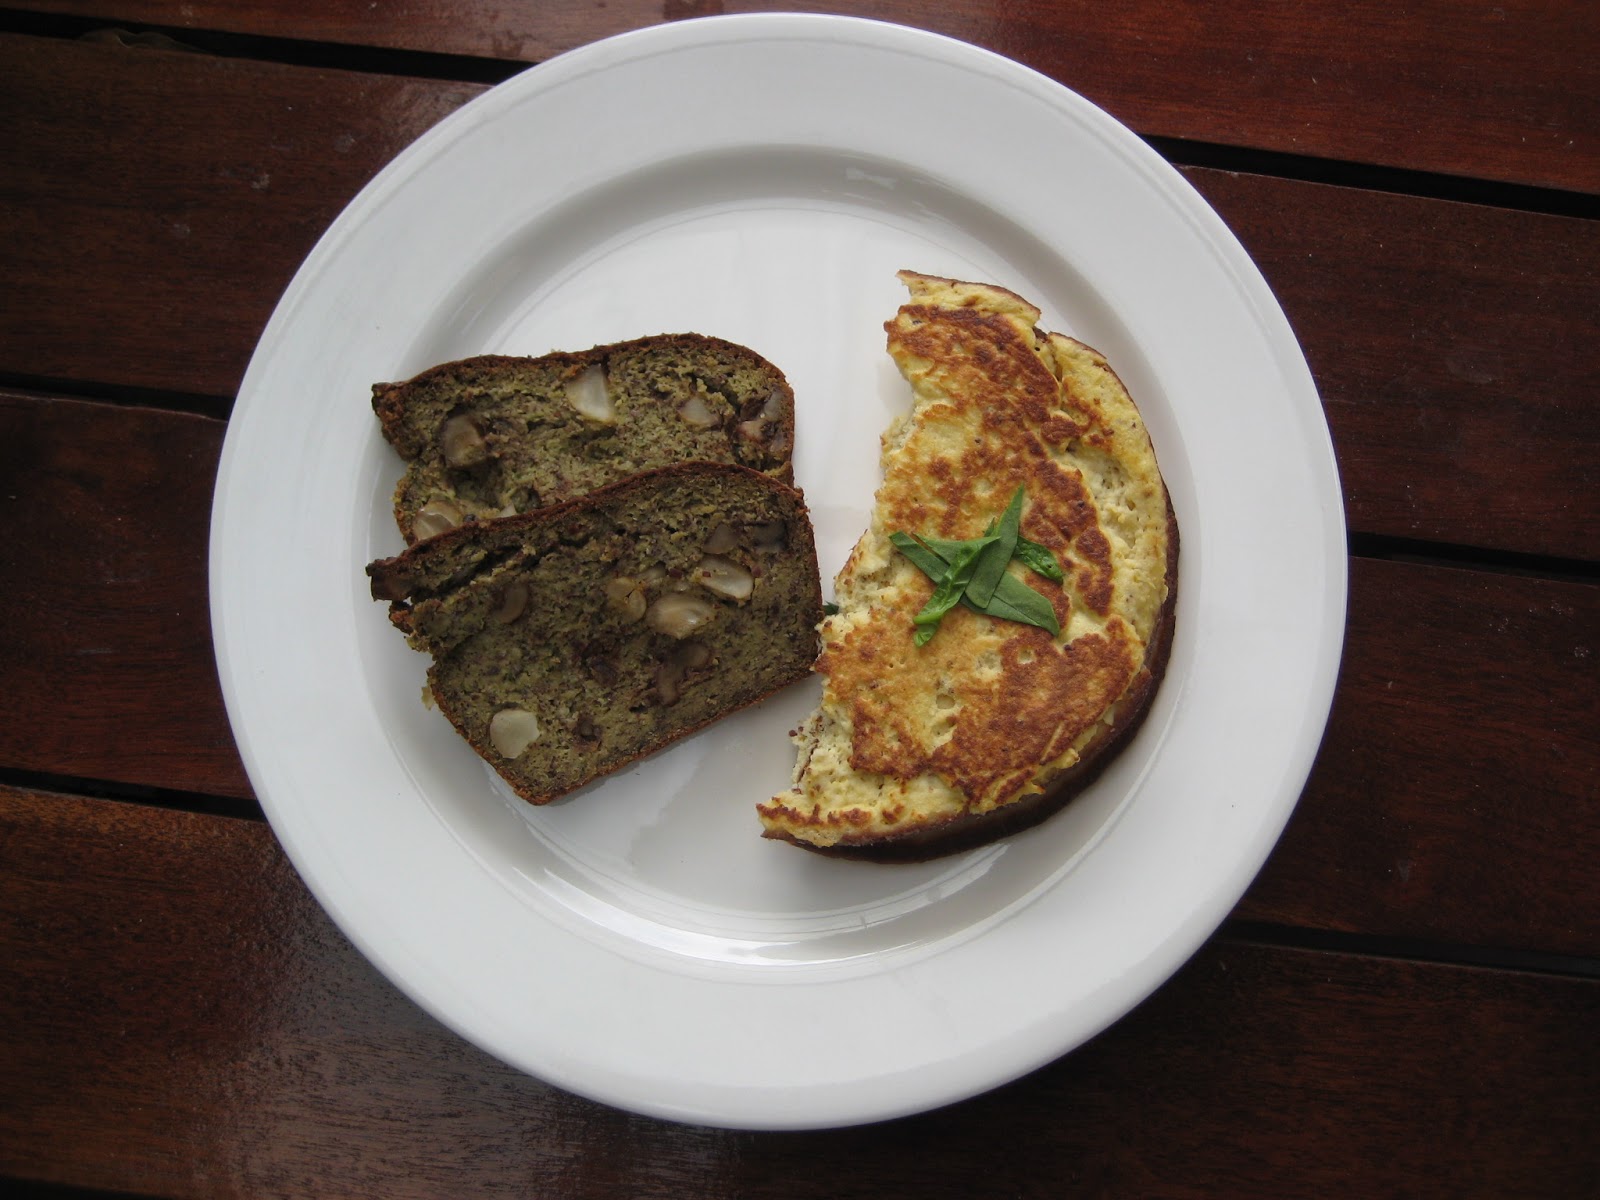
A yummy green smoothie will often do the trick (and you can follow me on instagram @the_change_room if you'd like to see some of the concoctions I make), but there are definitely mornings when I prefer something that isn't semisolid. Recently, my non- semisolid- breakfast cravings have been satisfied by this raspberry & coconut cacao loaf.

In addition to it being fragrant and tasty, it also boasts these benefits -
  • gluten free
  • dairy free
  • vegetarian
  • no refined sugar
  • no artificial colours, flavours or preservatives
  • low fructose & low in carbohydrates
  • high in protein, high in fibre & high in good fats
  • low glycaemic index
  • predominantly organic ingredients
  • diabetes & hypertension friendly
So in summary, it - like all of our products and recipes - is stamped with the change room's seal of approval. I hope it gets your stamp, too.

Try it by itself, try it toasted and then slathered with some organic tahini and sprinkled with some shredded coconut, try it toasted in a sandwich with some nut butter, or try it with a mug of steaming hot tea. Just try it. And let's see if we can make you a morning person, now that Autumn has arisen.

raspberry & coconut cacao loaf
makes 1 loaf


  • 2 cups hazelnut meal
  • 3/4 cup organic flaxmeal
  • 1/2 cup organic coconut flour
  • 1/2 cup finely dessicated coconut
  • 1/2 cup organic shredded coconut
  • 1/2 cup organic coconut palm sugar - you may want to use 3/4 cup instead, but I prefer it this way so that I can enjoy a greater variety of toppings
  • 1/4 cup organic raw cacao powder
  • 1 tbsp gluten free baking powder
  • 2 tsp xanthan gum
  • 1 tsp baking soda
  • small pinch Himalayan sea salt
  • 4 eggs
  • 3/4 cup organic coconut milk
  • 1/4 cup organic extra virgin coconut oil, melted
  • 2 tsp organic vanilla extract
  • 1 heaped cup frozen organic raspberries

    Preheat the oven to 200 degrees C.

    In a large mixing bowl, combine the dry ingredients (i.e. the hazelnut meal, flaxmeal, coconut flour, dessicated coconut, shredded coconut, coconut sugar, cacao powder, baking powder, xanthan gum, baking soda and sea salt).

    Break the eggs over the dry ingredients, then add the coconut milk, melted coconut oil and vanilla extract. Mix well. My wonderful boyfriend gave me a Kitchenaid mixer for my birthday this year (lovingly named "Merlot", because it's red), so I use that to do the mixing, but in the past I have found a sturdy, large metal spoon and a bit of elbow grease does the trick, too.

    Please note - the mixture will not be a very wet, cohesive batter. Coconut flour absorbs moisture much like a sponge, so the batter will appear crumbly but will feel moist. If you press the base of a spoon against the mixture and drag it, it should leave a firm, intact 'trail'.

    Break up any clumps of frozen berries before scattering them over the mixture. Fold several times.

    Use a large metal spoon to plop a few spoonfuls of mixture into the base of a silicon loaf pan - I imagine a well greased metal loaf tin would work just as well.

    The consistency of the batter means you cannot simply pour or scoop it into the pan and expect an intact loaf to rise. Use the base of the metal spoon to press the mixture very firmly down and into the very corners of the loaf pan. The batter should look firm and smooth. Continue with the remainder of the batter. The pan should be very tightly- packed.

    Bake for 30 minutes before covering securely with a sheet of aluminium foil. Bake for a further 20-25 minutes. It should sound hollow when you tap the top of the loaf. Leave in the loaf pan for 10 minutes before turning it onto a cooling rack, and wait until the loaf has completely cooled before slicing.

    Sunday 14 April 2013

    a lesson and a recipe - an earthy autumn salad

    If you're reading this post for my recipe, I suggest you scroll down now.

    If you're ready for yet another lengthy spiel of mine, then let me begin by saying this - I eat mindfully.

    First and foremost, I choose to eat foods with a low glycaemic index.

    Wait, I should re-phrase that - I choose to eat meals with a low glycaemic index. After all, we tend not to eat individual foods so much as we tend to eat a combination of foods - a combination otherwise known as meals, and snacks.

    Whenever possible, I also choose to eat organic produce. And alkaline foods. And raw foods.

    Oh, alright - I choose to do lots of things. In time, I will explain the reasons for these choices, but for now, I will focus on the decision that, in my mind, comes first.

    You see, I can't always find (or afford) organic ingredients. And eating a diet that is rich in alkaline foods is great - but we also need 'acidic' foods to remain healthy and balanced. Raw food provides many benefits, but eating raw everything isn't always practical or easy - or even always cheap.

    So, whenever I think about what I'll cook - and whenever I choose from a restaurant or cafe menu - the first thing I do is think about how I can ensure that my meal has an overall low glycaemic index. In my opinion, it is the easiest and most practical way to practice mindful and healthful eating.


    Back when I was studying to become a pharmacist, our university lecturers used to preach, "First, do no harm," and I believe that eating a low GI meal is an application of this. Before I reap the benefits of organic produce, before I re-balance my body with alkaline foods, and before I enhance the nutritional content of my diet with raw foods, first I must do no harm. Hmm, no, that's a tricky one. I must re-phrase that one, too.

    First, do no harm.
    Or, failing that - at least minimise harm.

    When we slow down the rate of gastric emptying - or put more simply, the rate at which food moves from our stomach into our intestines - we not only slow down the rate of glucose absorption, we also provide our bodies with a host of other benefits.

    As I discussed in last month's post, 'why i choose low g i - and the 411 on diabetes', a slowed gastric emptying rate also means a reduced demand for insulin - which means a reduced likelihood of developing conditions such as insulin resistance and diabetes. It also means that our bodies release less cortisol in response to our meals - but more on that at a later date.

    If those two reasons aren't enough to sway you (even though they should), then consider this - less insulin demand + less cortisol release = a healthier body + a leaner body. That's right, too much of either (and especialy both) of these hormones will encourage our bodies to store (and retain) fat!

    Of course, eating a low GI meal is easy when all of the meal's ingredients have a low GI (see the recipes for my 'ayurvedic' buckwheat salad and spinach & mixed nut bread + seeded mustard omelette for examples) - but let's be realistic here and acknowledge that that is not always possible. That's why it is important to be familiar with how to reduce a meal's glycaemic index -
    • add (good) fats
    • add protein
    • add something sour
    • add something spicy, and / or
    • add other foods that have a low glycaemic index
    Be mindful that glucose is only present when carbohydrates are present. If a food contains little or no carbohydrate, it will contain little or no glucose. Since the glycaemic index is a measure of how quickly our bodies absorb glucose from a food, that food will automatically have a low glycaemic index.

    Now, just as you can decrease glycaemic index, you can also increase it. This is where you have to be careful.

    For example, consider the glycaemic index of these four versions of a carrot -

    • Raw carrot = 16 (low)
    • Raw, diced carrot = 35 (low)
    • Diced, peeled and cooked carrot = 49 (low)
    • Peeled, cooked carrot, ground into a puree or a paste = 60 (moderate)

    Now think about how these four things taste and feel when you pop them into your mouth.

    A raw carrot is hard, and you need to chew it many times before you can swallow it. Chewing a diced carrot is a little easier because some of the hard work has already been done for you. A peeled, cooked carrot is softer and requires even less chewing - and a carrot puree does not even really require chewing at all.

    In general, the less effort required to break down and digest food, the faster it will be absorbed.

    Makes sense, right?

    That's why ripe bananas have a much higher glycaemic index than unripe bananas. Oh, but ripe bananas have so many more readily- available nutrients! That's why I choose to eat ripe bananas with protein and good fats. Are you beginning to understand how to apply this low GI business now? (And  if you haven't already tried the combination of ripe banana with peanut butter, get on it.)

    Fluffy white rice versus firm brown rice.
    White pasta versus wholemeal pasta.
    A freshly- picked apple versus apple puree.
    Really, the list is endless.

    Of course, the taste and texture of a food is just a haphazard way to gauge a food's glycaemic index - looking up the actual value is much more accurate. For my needs though, it is sufficient.

    The recipe for my earthy autumn salad is below, and it applies these concepts. I took a few carrots and raised their glycaemic index by peeling, chopping and baking them (they remain an overall low GI food nonetheless), and then -

    • added good fats (coconut oil, tahini, seeds and nuts)
    • added protein (seeds and nuts)
    • added something sour (freshly- squeezed lime juice, coconut vinegar)
    • added something spicy (cayenne pepper and smoked paprika)
    • added other foods that possess a low GI (umm... everything else?)

    I hope this spiel has been insightful and has helped you to understand how to 'first, do no harm - or, failing that, at least minimise harm'. And if not, well, please try this recipe anyway. The warm spices make eating my vegies easier during this cool Melbourne weather. I really think it's the bee's knees.

    an earthy autumn salad
    serves 3-4


    for the salad -
    • 2 large handfuls organic baby spinach leaves, washed
    • 2 handfuls organic baby kale leaves, washed and roughly chopped
    • 2 large carrots, peeled and cut into thick slices
    • 1 small red capsicum, washed, cored and cut into thick chunks
    • 1 large head of broccoli, washed and cut into small florets
    • 1/4 large eggplant,washed and cut into thick chunks
    • 5-6 tbsp organic extra virgin coconut oil
    • 1-2 handfuls organic macadamias
    • large handful organic sunflower seeds
    • large handful pumpkin seeds
    • pinch Himalayan sea salt
    • 2-3 tsp each of ground cumin, cayenne pepper, smoked paprika and ground sumac
    Please noteI use 3 teaspoons of each spice because I like my food intensely flavoured. If you are not a fan of spicy food, I suggest you use less of the cayenne pepper and smoked paprika (1.5 or 2 teaspoons of each should suffice).


      for the dressing -
      • 1 lime, freshly juiced
      • 3 tbsp organic unhulled tahini
      • 1 tbsp organic coconut nectar
      • 1 tbsp organic coconut vinegar or organic apple cider vinegar

      Preheat the oven to 180 degrees C.
      Line a baking tray with baking paper (or aluminum foil).

      Put the spinach and kale leaves in a serving bowl.

      Place the chopped carrots, capsicum, broccoli and eggplant in the lined tray. Drizzle the coconut oil over the vegetables and sprinkle with all of the spices. Use your hands to rub the oil and spices all over the vegetables.

      Bake for 35 minutes, until the vegetables are golden and fragrant.

      In the last 10 minutes of baking - i.e. 25 minutes into baking time - place the macadamia nuts, sunflower seeds and pumpkin seeds into another baking tray and bake until golden and roasted.

      To make the dressing, whisk together the lime juice, tahini, coconut nectar and vinegar.

      Spoon the roasted vegetables over the salad leaves and scatter with the seeds. Use a sharp knife to halve the roasted macadamias before adding them to the salad. Drizzle the dressing over the salad, and serve.

      Or do as I do, and top with a soft boiled (organic, free- range) egg.
      'More protein and good fats,' did I hear you say? Bingo. Good work.

      Sunday 7 April 2013

      my spinach & mixed nut bread + a seeded mustard omelette

      Gluten- free bread.

      Even looking at those three words makes me wrinkle my nose.

      Is it just me, or does gluten- free bread have a problem with sticking together? I mean, the stuff is crumbly. As in, it crumbles easily. As in, if you try to spread anything on it, it falls apart and leaves you with several pieces of torn bread.

      No, worse than that - you don't even need to spread anything on it. When you use it to make a sandwich and then take a bite, it still breaks in your hands and leaves you with several pieces of torn bread. And as an added bonus, it also leaves your hands covered with sandwich fillings.

      That one characteristic of gluten- free bread is the main reason I avoided the stuff for so long.

      Okay, perhaps I shouldn't have boycotted all gluten- free bread. Maybe there are actually decent versions out there that do stay in one piece when you bite into it. Maybe I just haven't tried the right brands yet.

      But alas! I am still haunted by the memory of that flight back in 2010. It was a Melbourne- to- Sydney flight that lasted a painstaking 1 hour and 45 minutes. All I did was take a bite of my gluten- free bread. One bite. And I was left with breadcrumbs all over my clothes, lap and blanket for the rest of the flight. I then accidentally ran my fingers through my hair and ended up with more crumbs in my hair and on my face.

      The woman sitting across the aisle had glanced over at me and then shook her head ever- so- slightly in dismay. The air stewards also looked perplexed. Rightfully so - I looked like I had chosen to throw breadcrumbs all over myself instead of eat my dinner.

      Anyway, if anybody can recommend a good brand of gluten- free bread, I am brave enough to try it now. And by "good brand", I mean something that will not only stay intact when bitten into, but also something that will pack a nutritional punch and taste amazing.

      Can't think of any? Well, never fear! Here I have my recipe for a spinach and mixed nut bread that satisfies those three criteria. I love to eat it by itself - the aroma and the crunch of nuts just does it for me. But I also love it with this seeded mustard omelette of mine. And this omelette is one I eat at least a couple of times a week. This meal just makes me (and my tastebuds) very happy.


      my spinach & mixed nut bread
      makes 1 loaf
      • 3 cups almond meal
      • 1/4 cup organic unsalted cashews, oven- roasted and roughly chopped
      • 1/4 cup organic unsalted macadamia nuts, oven- roasted and roughly chopped
      • 1/4 cup unsalted walnuts, oven- roasted and roughly chopped
      • 1/4 cup organic coconut palm sugar
      • 2 tbsp gluten- free baking powder
      • 2 tsp xanthan gum
      • 1/2 tsp organic Himalayan sea salt
      • 4 organic, free range eggs, whisked
      • 1/4 cup organic extra virgin coconut oil, melted
      • 1 cup (firmly packed) organic baby spinach leaves, washed
      • 1 cup organic, unsweetened almond milk
      Preheat the oven to 180 degrees C.

      In a large bowl, combine the almond meal, coconut palm sugar, baking powder, xanthan gum and sea salt.

      Put the spinach leaves and half of the almond milk (i.e. 1/2 cup only) into a food processor or blender and whizz for about 30 seconds until it is well blended.

      In another large bowl, combine the whisked eggs, spinach mixture, the coconut oil and the remainder of the almond milk.

      Pour the wet ingredients over the dry ingredients and use a large metal spoon to mix well.

      Scatter the oven- roasted nuts over the batter and mix well with the spoon.

      Pour / scoop the batter into a silicon loaf pan - you could probably use a greased and lined metal loaf tin instead - and bake for 35 minutes on the middle shelf. A deep brown crust will develop.

      Take the loaf pan out of the oven & carefully cover with a sheet of aluminium foil. Bake for a further 35-40 minutes. Leave it in the pan for 10-15 minutes before turning it onto a cooling rack, and then leave for a further 15 minutes before slicing it with a sharp knife.


      my seeded mustard omelette
      serves 1
      • 1/2 tbsp organic seeded mustard
      • 2 organic, free range eggs
      • 2 tbsp organic, unsweetened almond milk
      • 1/2 tbsp organic extra virgin coconut oil
      Put the seeded mustard, eggs and almond milk into a bowl & whisk until well combined.

      Heat a nonstick saucepan over medium- high heat and swirl the coconut oil around. Pour the egg mixture into the saucepan.

      When the sides of the omelette start to cook and set, use a wooden spatula to drag the cooked sides into the centre of the omelette. You can use a metal one if that is all you have - just be careful not to ruin the nonstick surface of your saucepan. This should allow the uncooked egg to dribble out to the sides and start cooking.

      Continue to do this until the omelette is almost entirely cooked through - you might need to lift the saucepan and swirl it around towards the end, to help the uncooked egg reach the sides of the pan.

      When the omelette is almost entirely cooked, turn off the heat and leave it for a few minutes. The residual heat will continue to cook the egg.

      Carefully slide the omelette onto a plate to serve.


      It is already (very) tasty like this, but you may add toppings if you wish. I recommend fresh slices of tomato, a bit of sliced Spanish onion, some organic feta and a small handful of fresh mint and basil leaves. Perfect.